
Managing Pain and Swelling After All-on-4 Implants in Plymouth: Practical Aftercare Tips for Faster Recovery
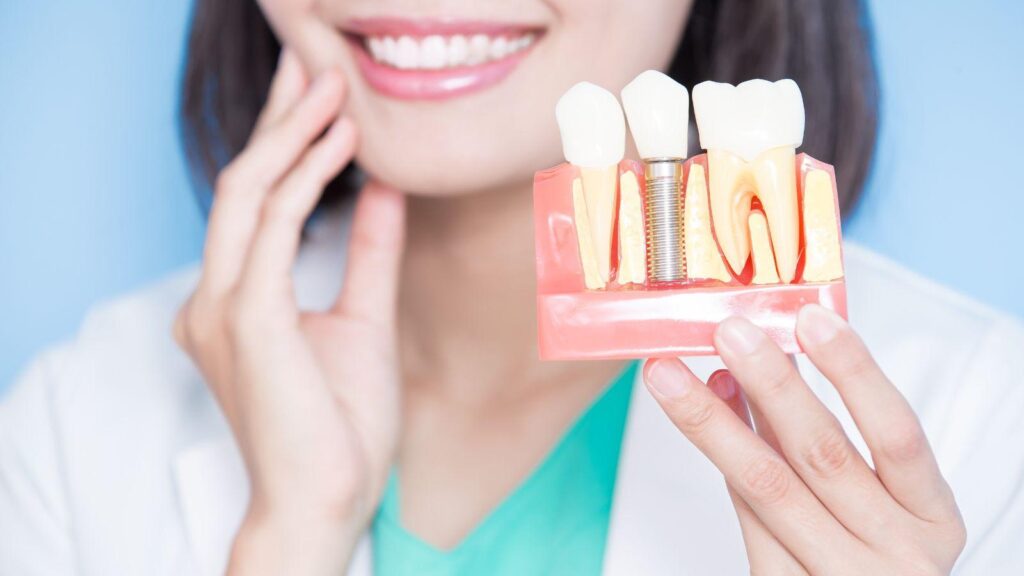
Getting all on 4 dental implants in Plymouth brings clear benefits, but you can expect some pain and swelling afterward.
You can control most discomfort with the right immediate care, proper medications, gentle oral hygiene, and a few practical diet and activity changes.
Followable steps help you move from the first 72 hours of peak swelling into steady healing over weeks and months.
The article shows what to do right away, when to call your clinician, and how local Plymouth resources can support your recovery so you feel confident at each stage.
Understanding Post-Procedure Discomfort
Expect predictable pain, swelling, and a few specific signs that tell you when healing is progressing or when to contact your dentist.
You’ll see most change in the first 72 hours, then gradual improvement over weeks as soft tissues settle and implants integrate.
Typical Pain Patterns After All-on-4
You will usually have the most pain during the first 48–72 hours after surgery.
Pain often feels like steady soreness and tenderness across the jaw, with sharper discomfort at implant sites when you move your mouth or touch the gums.
Pain intensity typically drops each day if you follow medication and rest instructions.
Prescribed or over-the-counter analgesics manage most pain; take them on the schedule your clinician gives you rather than waiting for severe pain to start.
If pain increases after initial improvement or spikes with fever, contact your dentist.
Sources of Swelling and Inflammation
Swelling comes from the surgical trauma to soft tissue and bone—your body’s normal inflammatory response to implant placement and any extractions done at the same time.
Expect visible swelling of the cheeks and sometimes under the eyes; this usually peaks around day two or three.
Other contributors include fluid accumulation in the tissues, normal bleeding into the soft tissue, and muscle tension from keeping your mouth open during surgery.
Ice applied intermittently in the first 48 hours, sleeping with your head elevated, and avoiding strenuous activity reduce swelling.
Persistent or worsening asymmetrical swelling can indicate infection or a hematoma and requires prompt review.
Normal vs. Concerning Symptoms
Normal symptoms: steady reduction in pain, bruising, mild oozing from the sockets, numbness that slowly improves, and peak swelling around day two or three followed by gradual decline.
You should be able to manage symptoms with prescribed meds, cold packs, soft food, and rest.
Concerning signs: increasing or severe pain after initial improvement, heavy continuous bleeding, fever above 38°C (100.4°F), spreading redness, pus, severe jaw stiffness preventing you from opening your mouth, or new numbness that appears suddenly.
If you notice these, contact your Plymouth implant team or seek urgent care immediately.
Immediate Care Strategies
Control swelling and pain quickly with targeted cold therapy, proper head positioning, and limiting movement.
These actions reduce bleeding, lower inflammation, and help the surgical area start healing without strain.
Ice Application Techniques
Apply an ice pack to the cheek over the surgical site for the first 48–72 hours to reduce swelling and numb pain.
Use a commercial gel pack or a bag of frozen peas wrapped in a thin towel to avoid direct skin contact; keep the pack on for 15–20 minutes, then off for 15–20 minutes.
Follow an hourly schedule while awake during the first day: 15–20 minutes on, 15–20 minutes off.
After 48–72 hours, switch to warm compresses only if swelling persists and your surgeon approves.
Avoid heat during the first two days because it can increase bleeding and inflammation.
Watch for skin irritation or numbness; stop if you feel excessive cold or skin whitening.
Keep ice application localized—do not press hard—and don’t sleep with an ice pack in place.
Elevating the Head
Keep your head elevated above heart level for the first 48–72 hours to reduce facial swelling and throbbing.
Use two pillows or a recliner to maintain a 30–45 degree incline while resting or sleeping.
Elevating helps venous drainage from the face, which reduces pressure at implant sites and lowers bleeding risk.
Remain upright for short periods after meals to aid comfort and digestion.
Avoid sudden head movements or bending over, since these actions can increase blood flow to the jaw and worsen swelling.
If you experience dizziness while upright, lower your angle slowly and notify your dental team.
Managing Activity Level
Limit physical activity for at least 3–5 days after surgery to prevent bleeding and disruption of the surgical site.
Avoid heavy lifting, strenuous exercise, and activities that raise your heart rate above moderate levels.
Resume light walking within 24–48 hours to promote circulation, but stop if you feel increased pain or bleeding.
Avoid bending, straining, and heavy coughing; use stool softeners if constipation from pain meds could cause straining.
Follow your surgeon’s timeline for returning to work and exercise.
Gradually increase activity based on pain, swelling, and your clinician’s clearance to protect osseointegration and reduce complication risk.
Medication and Professional Guidance
You will use a mix of over-the-counter and prescribed medicines, and your implant team will set specific timing and warning signs.
Follow dosing schedules precisely and keep scheduled follow-ups so your clinician can monitor healing and make adjustments.
Over-the-Counter Pain Relief
Use ibuprofen (200–400 mg) every 4–6 hours as your first-line anti-inflammatory pain control unless your dentist or GP advises otherwise.
Do not exceed 1200 mg in 24 hours without medical approval; pair it with acetaminophen (500–1000 mg every 4–6 hours, max 3000 mg/24 hr) for better pain control if needed.
Take medications with food to reduce stomach upset.
Avoid aspirin for the first week unless your surgeon told you to continue it, because it can increase bleeding.
Track doses on your phone or a paper chart so you do not miss or double-dose.
Prescription Medication Protocols
If prescribed antibiotics, take the full course on schedule; stopping early can encourage infection.
Common regimens after All-on-4 include amoxicillin or, if allergic, doxycycline or clindamycin — follow your dentist’s exact choice and dose.
For narcotic pain meds, take the lowest effective dose for the shortest time.
Expect a switch to non-opioid analgesics within 48–72 hours for most patients.
Watch for side effects: constipation, drowsiness, or nausea.
Don’t drive or drink alcohol while using sedatives or opioids.
Report any rash, severe stomach pain, persistent vomiting, or trouble breathing immediately.
When to Contact Your Implant Dentist
Contact your implant dentist right away if you have uncontrolled bleeding after applying gentle pressure for 20–30 minutes.
Also call for signs of infection: worsening pain after initial improvement, increasing swelling, redness spreading beyond the surgical area, fever over 38°C (100.4°F), or foul-tasting drainage.
Seek urgent advice if you develop severe allergic reactions (hives, facial swelling, difficulty breathing) or if pain does not respond to prescribed medication within 72 hours.
Keep your clinic’s emergency number saved and bring a list of current medications and allergies to every post-op visit.
Oral Hygiene Considerations
Maintain strict cleanliness without scrubbing the surgical sites.
Focus on removing food debris, reducing bacterial load, and protecting the healing soft tissue around the implants.
Gentle Cleaning Approaches
Use a soft-bristled toothbrush or a post-op brush with the smallest head you can comfortably fit.
Brush the prosthetic teeth twice daily with light pressure; hold the brush at a 45° angle and use short, gentle strokes to clean the gumline and implant framework.
Avoid aggressive horizontal scrubbing near the surgical area for the first 2–4 weeks.
If you wear a temporary prosthesis, remove and clean it per your surgeon’s instructions—do not attempt to flex or force it in place.
Supplement brushing with interdental cleaning once daily.
Use a single-tuft brush or soft interdental brush sized to the gap between the prosthesis and soft tissue.
Slide the brush gently under the bar or pontic area to dislodge trapped food without probing the surgical sockets.
Rinsing Recommendations
Begin rinsing the day after surgery unless your surgeon tells you otherwise.
Use a prescribed chlorhexidine rinse or a 0.12%–0.2% chlorhexidine solution twice daily for 30 seconds to reduce bacterial load around the implants.
Do not swallow the rinse.
For routine aftercare, saline rinses (1/4–1/2 teaspoon of salt in 8 ounces of warm water) used 3–4 times daily help soothe tissues and clear debris.
Wait 15–30 minutes after eating before rinsing to avoid disturbing clotting.
Avoid forceful swishing; use gentle tilting and small swishes to move fluid around the surgical sites.
Products to Avoid During Recovery
Do not use alcohol-based mouthwashes, as they can irritate healing mucosa and delay tissue recovery.
Steer clear of whitening toothpastes and abrasive powders for at least 8–12 weeks; they can scratch prosthetic surfaces and increase plaque retention.
Avoid oral irrigators (water flossers) directed at the surgical sites during the first month.
High-pressure streams can dislodge clots and introduce bacteria into the sockets.
Do not apply topical home remedies (hydrogen peroxide rinses, undiluted essential oils) without your surgeon’s approval.
These agents can be cytotoxic to healing tissue and may cause increased pain or delayed healing.
Diet and Swelling Control
Eating the right foods and drinking enough fluids reduces inflammation, supports tissue repair, and helps you avoid disturbing the surgical sites.
Follow gentle textures, prioritize protein and micronutrients, and steer clear of hard or hot foods that could irritate the implants.
Recommended Foods After Implant Surgery
Focus on soft, nutrient-dense options for the first 7–14 days.
Choose:
- Protein sources: Greek yogurt, strained cottage cheese, smooth protein shakes, and well-blended legumes to support collagen and bone healing.
- Low-fiber cooked vegetables: Pureed carrots, mashed sweet potato, and steamed zucchini provide vitamins without chewing stress.
- Soft carbohydrates: Oatmeal, polenta, and well-cooked pasta give energy and are easy on tissues.
- Healthy fats: Avocado, olive oil blended into soups, and nut butter (smooth) reduce inflammation and help absorb fat‑soluble vitamins.
Avoid crunchy, chewy, or sticky foods (nuts, chips, crusty bread, gum) and foods that require biting with front teeth (whole apples).
Keep foods at warm—not hot—temperatures to prevent increased blood flow and swelling.
Hydration and Its Role in Recovery
Drink regularly to support circulation, reduce swelling, and help antibiotics reach tissues.
Aim for at least 2–3 liters of water daily, unless your dentist gives different instructions.
Include electrolyte beverages if you’re experiencing reduced intake from pain or nausea.
Avoid alcohol and hot caffeinated drinks for the first week; they can thin blood, increase bleeding risk, and worsen swelling.
Use a straw only if your surgeon permits it—suction can dislodge clots and impair healing.
Long-Term Healing Support
Expect gradual improvement over months as bone integrates with the implants, while you rebuild strength and function through a staged return to normal habits.
Maintain consistent care, watch for warning signs, and keep scheduled follow-ups to protect long-term results.
Transitioning Back to Regular Activities
Resume light exercise (walking, gentle cycling) after 1–2 weeks if your surgeon cleared you and bleeding has stopped.
Avoid heavy lifting, intense gym sessions, and contact sports for at least 6–8 weeks to prevent spikes in blood pressure that can disrupt healing.
Reintroduce harder foods gradually once your clinician confirms osseointegration progress—typically after the first few months.
Start with firmer cooked vegetables and well-cooked meats; avoid hard, crunchy items (nuts, ice, hard candy) until you have a final prosthesis and your dentist approves.
Plan stepwise dental visits: soft-tissue checks at 1 and 4 weeks, implant stability evaluation at 3 months, and prosthesis adjustments as needed.
If you wear a temporary arch, follow the lab’s cleaning and wear instructions precisely to avoid pressure spots and tissue irritation.
Monitoring for Delayed Complications
Track symptoms daily for the first 3 months, noting increasing pain, prolonged swelling after the initial weeks, persistent pus, or a loose prosthesis.
Report any of these signs to your dentist immediately; early intervention often prevents implant loss.
Use a simple checklist at home: temperature over 38°C (100.4°F), foul taste or drainage, new or worsening numbness, and progressive mobility of the prosthesis.
Bring photos or short videos to appointments if signs are intermittent—visual evidence helps clinicians assess subtle changes.
Attend radiographic follow-ups as scheduled (usually 3–6 months and then annually) to detect bone loss, peri-implant radiolucency, or hardware issues before symptoms appear.
Maintain excellent oral hygiene and avoid smoking, which increases the risk of late infection and implant failure.
Local Resources in Plymouth
You can find local clinics, pain specialists, and emergency dental options to help control swelling, manage pain, and handle complications after All-on-4 placement.
Know where to call, what to expect from aftercare, and which facilities offer urgent evaluation.
Finding Aftercare Support
Look for oral surgery or implant teams in Plymouth with experience in post‑op implant care.
Aspen Dental in Plymouth provides oral surgery and implant services and can manage routine follow‑up, suture removal, and prosthesis adjustments.
Private practices such as Dr. Lane’s offices serve facial trauma and implant patients and may offer faster same‑office follow‑ups for complications or sore spots under the prosthesis.
Consider pain management clinics when pain is disproportionate or persistent.
Beth Israel Deaconess Hospital–Plymouth and Spaulding Rehabilitation’s Pain Management Center both offer conservative and interventional options; they can perform therapeutic injections or nerve blocks if needed and will coordinate with your surgeon.
Bring your surgical notes, medication list, and a clear timeline of symptoms to any visit to speed assessment and appropriate treatment.
Dental Emergency Services
For acute issues—heavy bleeding, uncontrolled swelling, fever, or signs of implant failure—seek urgent evaluation. Many Plymouth practices offer limited emergency hours; call your surgeon first.
If you cannot reach your surgeon, head to an urgent care or the emergency department at a hospital that handles maxillofacial emergencies.
Use this quick checklist when calling or arriving for emergency care:
- Describe onset, severity, and progression of pain or swelling.
- Note fever, drainage, or difficulty breathing/swallowing.
- Provide date of implant surgery and any imaging or post‑op instructions.
If your issue is primarily pain without red flags, contact a pain medicine specialist or your implant team for same‑day medication adjustments before visiting the ED.
About The Author