When people think about calisthenics, they dream of crafting a sculpted and toned physique and, above all, explosive strength. For that, often, the first part of the body that comes to mind is the abs. The six-pack dream is alive and kicking, and these calisthenic ab workouts can help you achieve it.
The aesthetic payoff is welcomed, but don’t overlook the benefits of having a powerful, solid core. Achieve that, and you’ll benefit from a better posture and improved mobility. A strong core doesn’t come easily. You need to have both consistency and proper form, and you need both in abundance.
Weave these calisthenic ab workouts into your program, and you’ll quickly begin to notice the improvements.
Plank
Targeted Muscles: The core, primarily the transverse abdominis, rectus abdominis, and external and internal obliques. Great form will also include the shoulders, chest, and glutes. This is a real full-body workout.
Description: Plank is a fundamental exercise of calisthenics. Few programs will omit it. Its simplicity is matched by its effectiveness. Plus, it’s a great exercise to judge progression.
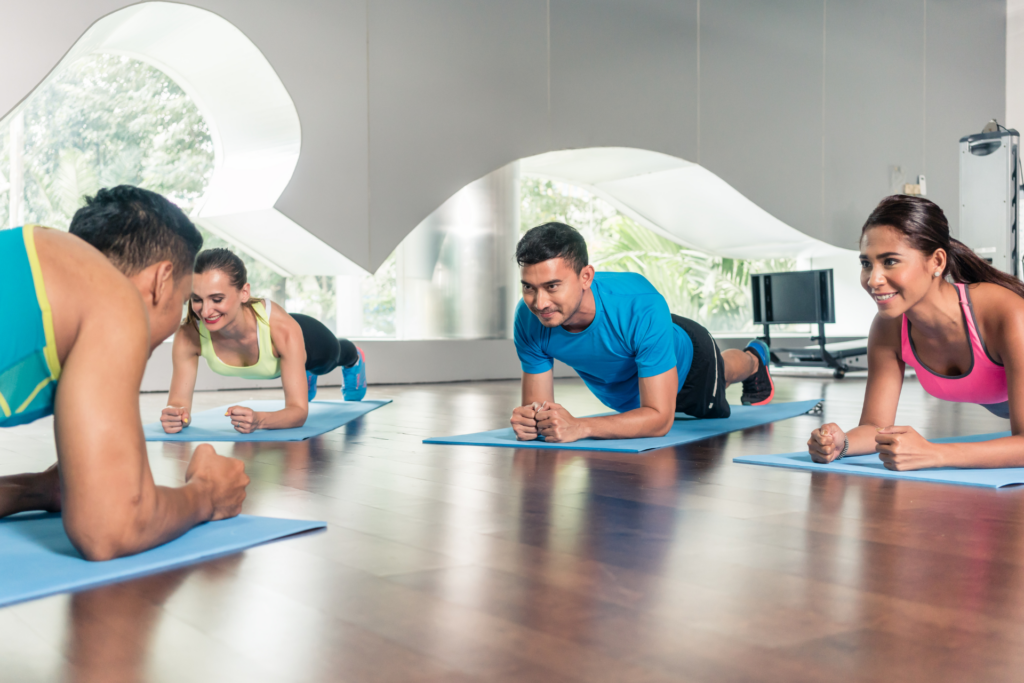
- Prepare: You can start from a prone position. Lie directly onto the floor or over a yoga mat. Put your weight onto your forearms and raise your toes. Try to tuck your elbows under your shoulders so your body forms a straight, uniform line.
- Engage: Clench your abdominal muscles so your belly button rises toward your spine. This helps to straighten your back,
- Align: Keep your head steady and look at a spot on the ground around 30cm in front of your arms. Stick with this position.
- Hold: Try to hold this position for as long as you can. Many people use a fitness app or timer on their phone to time their planks. A good aim is 20-30 seconds for beginners. Keep your breathing steady.
- Lower: When you’re finished slowly lower yourself down to the ground.

People don’t often complete sets of planks; instead, they complete the exercise multiple times throughout their workout. If you’re a complete beginner, consider starting on your knees to make it more manageable.
Leg Raises
Targeted Muscles: Lower abdominals and hip flexors.
Description: This is a perfect choice if you’re looking for lower abdomen toning. It’s a tricky area to isolate and work on, but leg raises nail it. This exercise also naturally engages the core, ensuring you’re building centralized stability.
- Prepare: Lie on your back, either straight onto the ground or on a yoga mat. Your legs should be flat and straight. Some people like to cushion their lower back with their hands. Press your entire back into the mat.
- Lift: Keep your legs straight and together and begin to raise them away from the mat. It’s important to keep your lower back connected to the floor.
- Lower: Slowly lower them down once you reach a 90-degree angle (or as high as you can). This should be a controlled motion so that your core and abdomen maintain tension. Try to stop your legs from hitting the floor. Instead, aim for them to hover about an inch from the ground.
- Repeat: Aim to complete 3 sets of around 10-12 to begin with. Focus on your form throughout and avoid getting faster through momentum. If you find yourself starting to rock, slow things down.
Russian Twists
Targeted Muscles: Obliques, but the entire core is engaged, including the major abdomen muscle groups.
Description: The focus here is a rotational movement. It’s great at building definition in your sides with the added benefit of improved stability and strength.
- Prepare: Sit down so that your knees are bent with your feet flat on the floor. Lean back so that your upper body forms around a 90-degree angle with your hips and legs. If you’re up for a challenge, lift your feet off the floor.
- Engage: For this exercise to be effective, you need to engage your core at this point. It targets the abdomen but also stabilizes your spin. If you need support, clasp your hands in front of you.
- Rotate: Twist your upper body to the left or right and bring your hands down to the hip on the same side.
- Return and Rotate: Twist from your first side right across to the other side. Your hands should finish on the opposite hip.
- Repeat: Aim to complete 3 sets of around 10-15 to begin with. If you’re finding it easy, consider adding resistance bands or holding a weight in your hands.
Calisthenic Workout Equipment
If you’re serious about training, it’s worth investing in quality fitness gear. You’ll feel a noticeable difference in your training sessions. Some equipment adds an additional challenge. Others ensure that you’re making the most out of your workouts.
- The Fit! Home Gym: The Fit! home gym is an incredibly versatile system that ensures you have everything you need to complete a quality calisthenics workout. Our equipment helps you to maintain form and makes the whole process far more efficient. We’ve designed it specifically to help you progress through your calisthenic programs and build your abdominal strength.
- Pull-up bar stands at 76”.
- A 23.5” base allows you to complete pushups comfortably.
- In between, the dip bar works perfectly for all heights, at 33.5”.
- Weights: A set of bar weights or dumbbells will allow you to take your calisthenic ab workouts to a level beyond your own body weight.
- Resistance Bands: If you find certain exercises too simple, adding taught resistance bands can make them more challenging.
Key Takeaways
Calisthenic ab workouts aren’t for the faint-hearted. They’re designed to push your core and abdominal muscles so that they work hard. The trick is consistency and form. Once you get into the groove of routine and regular workouts, you’ll quickly see progression and results.
- Calisthenic ab workouts aren’t a race. They rely on a steady form that builds strength over time.
- Stop immediately and rest if you begin to feel exhaustion or a twinge of injury.
- Adding in a yoga mat can really save your back during floor work.


